

RecklessReflections
-
Posts
1,587 -
Joined
-
Last visited
Content Type
Profiles
Forums
Events
Subscriptions
Posts posted by RecklessReflections
-
-
It's actually FXPM 25%Blackout on the hell cat as well?

Just busting your balls from the previous post.
I know, I never take things like that seriously, don't worry. It's all good JH!

-
Went to KTLA 5 this morning to do 6 windows with blackout.
Then another blackout job on Hollywood BLVD
Then this Hellcat later on
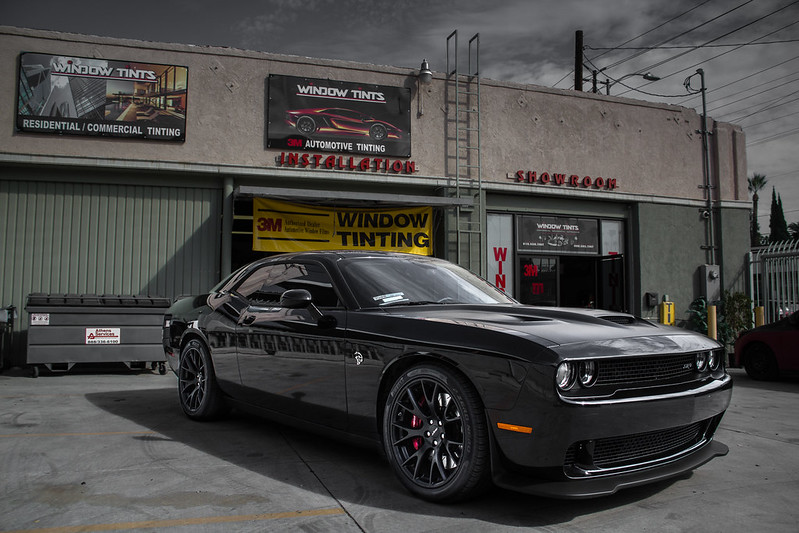
My only critique would be to move the yellow banner up to the top to clean up that area of the wall . Then move the wheeled dumpster outta the area your pics are taken.
Good to see no reflections of the mop bucket in this set.!!
 :thumb
I'm no photographer. I put giant stickers on peoples walls and glass . What do I know?
Thanks for the input, Fox.
Sadly I used to have that yellow banner up on the wall as you mentioned but the city came by and said it's not allowed to be on there due to it being a "temporary" material. So anything like canvas banners cannot be displayed on the building/structure. So my boss told me to hang it on the door that way it hangs within the bay and not outside.
As for the trashcan that's just pure laziness for me

Next time I'll keep that in mind and move it inside the bay temporarily while I take a photo. Sometimes depending how full the lot is I try to park the car in front of it so it can hide it or at least have the car moved more the the right.
-
It's actually FXPM 25%Blackout on the hell cat as well?
-
Went to KTLA 5 this morning to do 6 windows with blackout.
Then another blackout job on Hollywood BLVD
Then this Hellcat later on
-
From yesterday
Commercial job in the morning for a Rug company, essentially just wanted UV protection
ULVDS 70%
45 panes


Toyota Tundra 1794 edition.
CS 20% rear section.
CS 35% front doors.
CR 70% windshield.
The roll down back window was super easy as well.


Then a front door removal and Door edge / Door cup PPF for a body shop
-
-
TC get's crackin' when it comes down to tintin'

-
Did some carbon fiber wrap on the ground effects of this Maserati.
Rear diffuser, side skirts, and partial front lower lip.


-
Had a residential job this morning using nature 40


Then this massive BMW
Crystalline 40% rear section with both sun roofs
Crystalline 70% on front doors + windshield.


-
Thanks man.
-
Good stuff Tint Cracker, the 2005 version of that whip is fun

I did a few things today.
Two estimates for R/R Anti Graffiti.
Then from an earlier post where I went to Nickelodeon studios on Sunset where I R/R on a window pane using Architectural blue 35%. They had another window that needed to be done.
And finally I did this residential job in Beverly Hills using ULVDS 70%
Again you cannot tell the difference since it's so light but I decided to post the before/after for the hell of it.


-
I have had 14 tint tickets in just over 4 years.

Safe to say you really make a contribution to the community/state then.
-
I just got pulled over this past Sunday for my tint.

He asked what's the reason for the tint. Told him I have a lot of work tools/drills/blade packs as well as film in my car at all times and I'm not wanting them to be snatched because they could see what's inside so easily. So I rolled my back windows down to show him all what I have in the back of my car.
He looked, then asked if I ever been arrested, on parol, ect and I said no and no.
He asked if I had a problem with searching my vehicle, I said go ahead I don't have anything except tools and film. He didn't bother.Went back to his car and checked my license and said he wasn't going to bother writing me the ticket.
-
Looks good!!
I have a job on friday using that film.
DT- Really cool shot!
Thanks, Roach!
I love working with that film/line in general. Liner releases like butter.
-
Did a nice residential job this morning in Manhattan beach.
16 windows with ULVDS 50
2 windows with white frost in the bathroom (Didn't get to get photos of those two since the bathroom was being occupied)
Also, didn't bother posting before shots since the film is so light, there wasn't a dramatic noticeable difference between the sets.


-
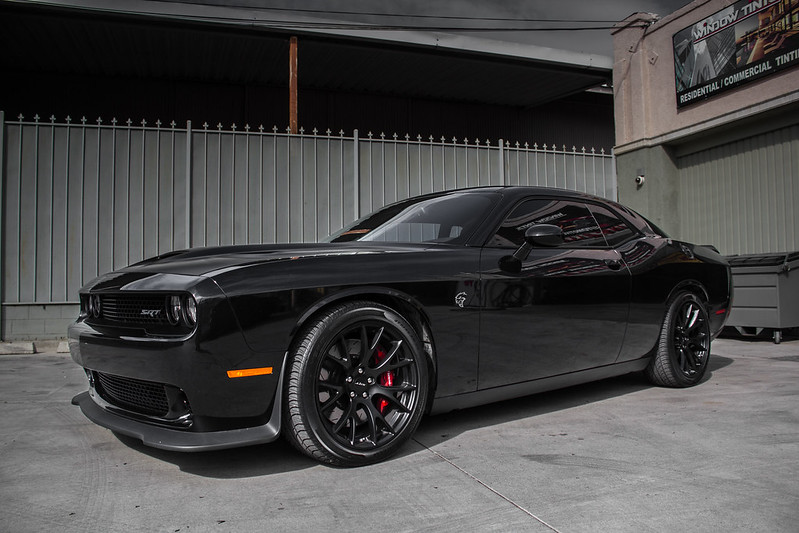
Did a brand new Hellcat Challenger yesterday.
Full Colorstable 20%
Crystalline 70% on the windshield and a front bumper PPF kit

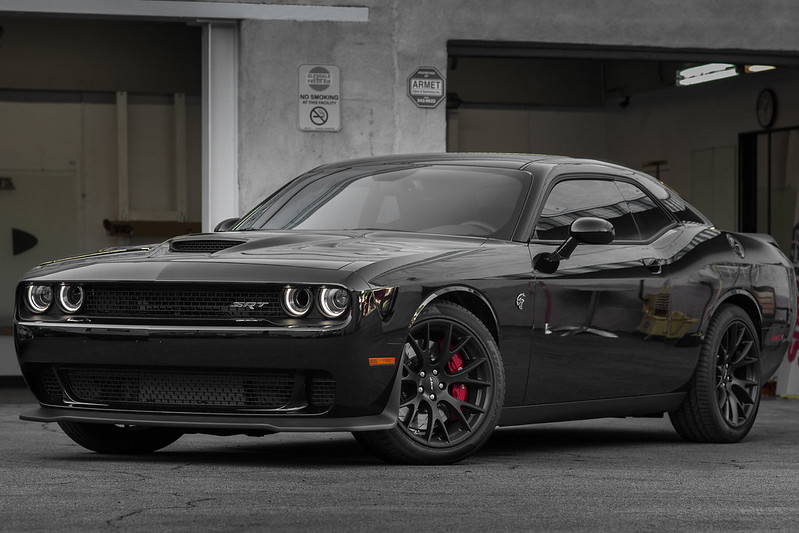

Earlier in the morning was on a commercial lot with my boss to lay up illusion on 18 windows


-
CR40 fronts
CR50 rears

-
Thanks guys!
Forgot to post this one yesterday. Went down the street from our other location to a Lexus dealership we do work for. They had this setup that they needed to have blackout applied to in order to hide all the madness that was being visible to people.
Bars were pretty close to the glass, as well as 4 bracket cut outs needed.


-
Went to Ozzie Osbournes house this morning to do his new Range Rover SVR
Two front doors and windshield.


-
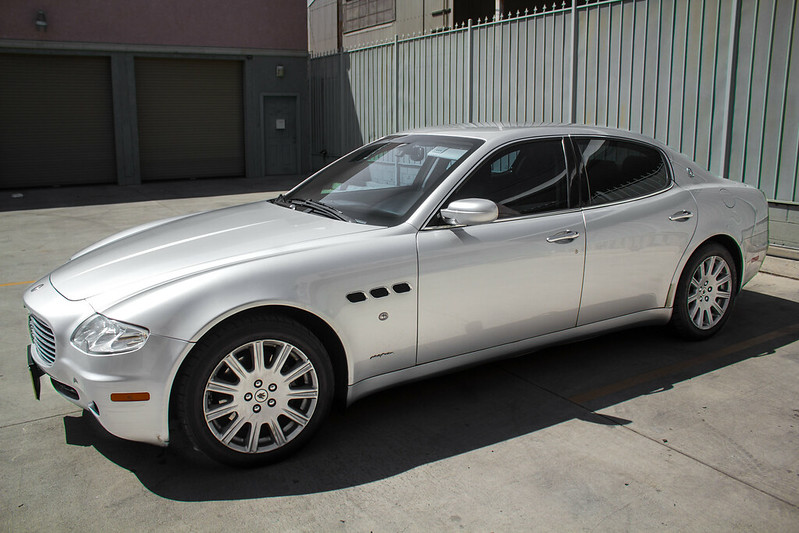
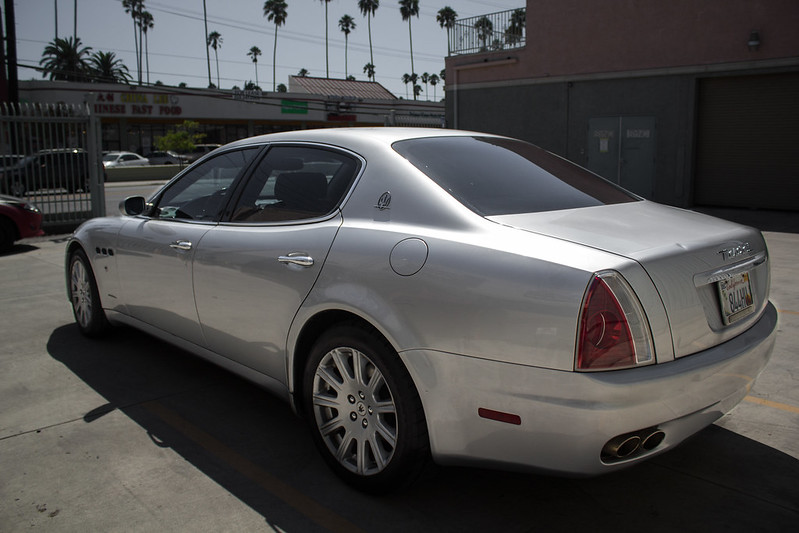
2005 maserati quattroporte
Color stable full tint.
35% roll ups
20% back window.
Back doors were a fun challenge.
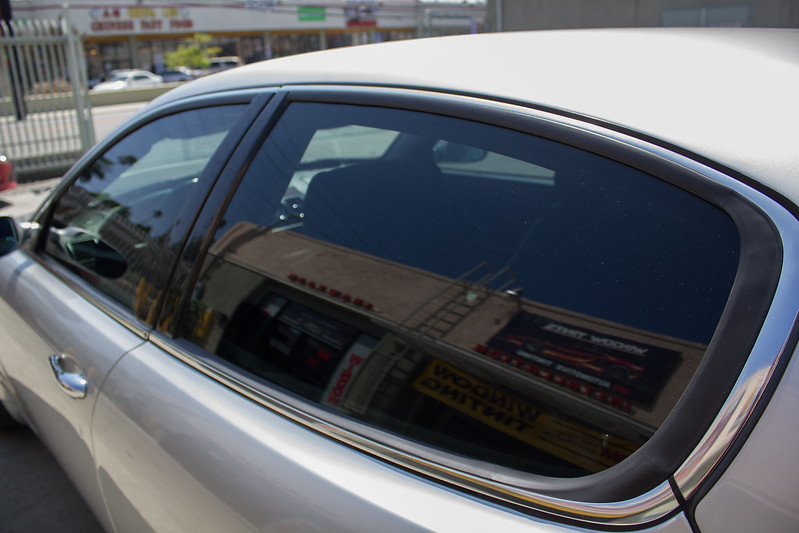
how did u go about getting those rear roll ups done? ive done a couple and find them to be a nightmare.
They were actually the first things I wanted to knock out on the car.
It's also a two stage install. What I did that I found to be "easiest" is upon installing the top edge and before tuck/folding the side that would essentially be the hardest...I actually peel the liner off half way and tuck the film evenly into that nightmare of a channel without having to fold the film within itself and having to deal with a massive crease upon rolling up the window to unfold the film and install the bottom half.
The only thing to do if you end up doing it that way is to make sure the panel itself is really clean because the film being exposed from peeling the bottom half nearly all off it could grab contaminants. Now you still may get a crink or two on the film but don't squeegee the water out just yet. Instead, use your heat gun to slowly heat the glass until you see the water between the film beginning to dissipate, then grab your slammer with a towel and with one smooth motion pressing firm, press all the water out and it will also press the crinks out cleanly without having to blur anything out afterwards.
Hope this helps!
-
2005 maserati quattroporte
Color stable full tint.
35% roll ups
20% back window.
Back doors were a fun challenge.
-
2013 Porsche
Crystalline 50% full tint
Crystalline 70% windshield


-
 S A H W E E E E T !!!!! Very nice work
Thanks!
-
2014 Bentley Flying Spur.
CS20% full tint.
CR50% windshield

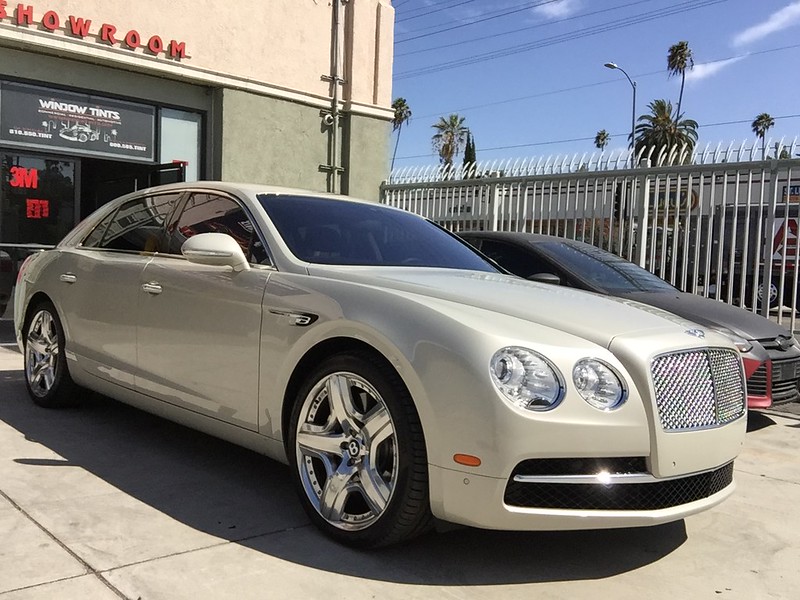


Those front quarter windows were interesting.
I see it has an outlined "gasket" but I slid my piece past that and got the full pattern. Same for the back, but those were easier.


 :thumb


 S A H W E E E E T !!!!!
What did you tint today?
in Window Tinting - General Discussion
Posted
Indeed it does!