

nc_detail_garage
-
Posts
5 -
Joined
-
Last visited
Content Type
Profiles
Forums
Events
Subscriptions
Posts posted by nc_detail_garage
-
-
On 8/10/2018 at 7:42 PM, pro-tect mobile said:
Great post. Fortunately you had a very easy hood to work on. One thing to note is don't waste your time waxing or applying a sealant before film installation. And if you are going to be doing this more in the future take a class. It will save you a lot of time, stress, and money.
I hear you on the sealant, it's just the detailer in me I suppose. In regards to the class, I did take the 3 day 3M class in June. You're absolutely right, the class was very helpful for me to learn the basics and start gaining confidence.
-
On 8/10/2018 at 5:23 PM, STEK HOWARD said:
Hey Larry, thank you for the thoughtful right-up. I think you have taken a very responsible approach to further develop your skills, your photos are great. We would encourage you to give your film options a good stretch test when nailing down which you decide to install.
") Best, STEK Michael
Best, STEK Michael
Thank you for the support, Michael. There seems to be great products available from a variety of companies which is great.
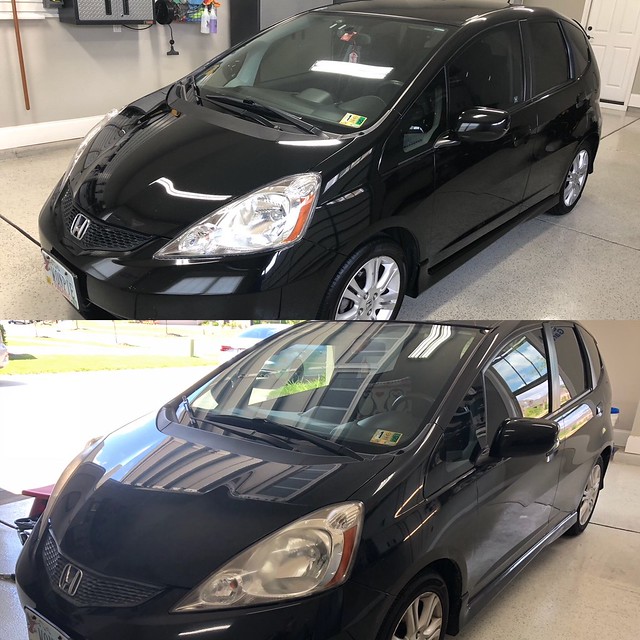
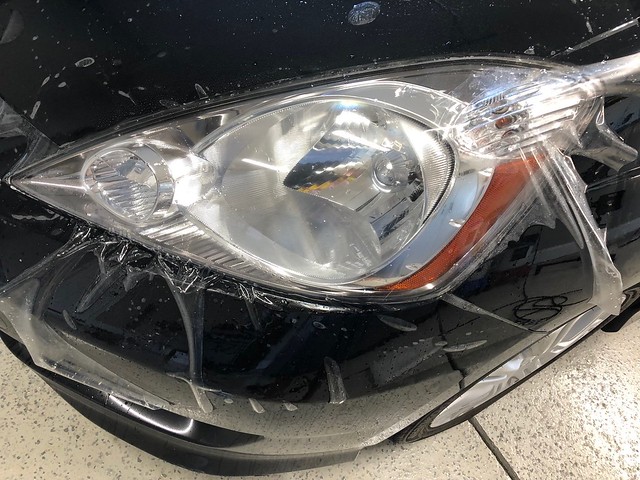
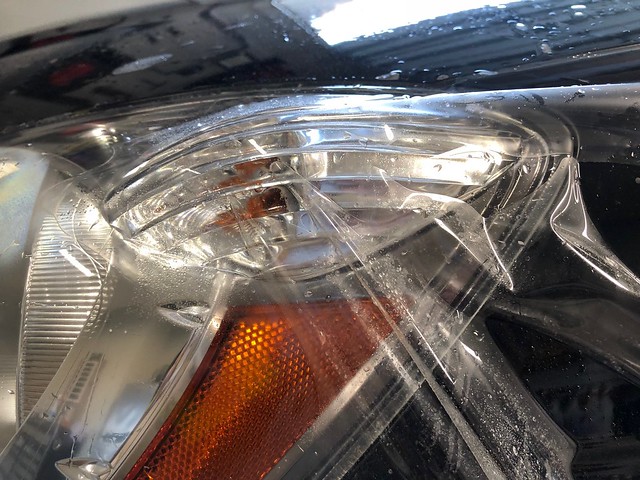
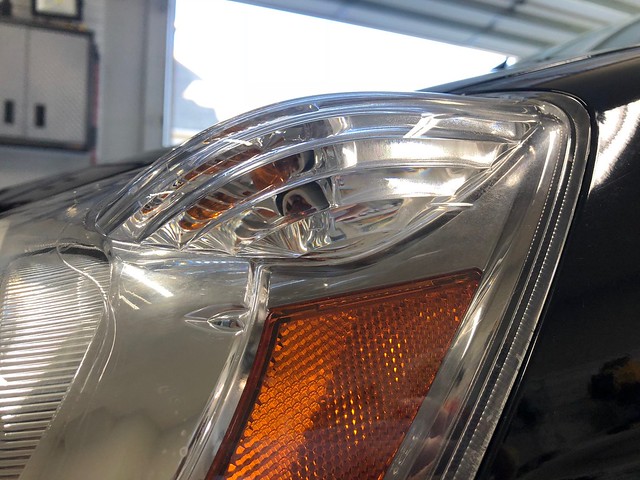
I used the last of the Dynoshield you were so kind to send on the headlights for this Honda Fit. We had old friends visiting from NOVA this past weekend and they brought down their tired 140k car. I couldn't leave it alone so I put my friend to work as the girls ran off for the afternoon. I opted to do a light polish using Shine Supply Burn Out and topped with Shine Supply Daddy-O. I restored the headlights (800g, 1500g, 2500g, compound, polish) and protected w/ the STEK film.
The little turn signal protrusion was my biggest challenge. I don't think pre-cut headlights would've worked well as I needed the extra material to tack to the surrounding paint to allow sufficient stretch to get past the large bump.
 h4 by Larry Bishop, on Flickr
 h1 by Larry Bishop, on Flickr
 h2 by Larry Bishop, on Flickr
end result, it's down and on there
 h3 by Larry Bishop, on Flickr
-
Hello All,
I've been reading past articles for awhile now and figured an introductory post was in order. I work in finance full-time but have been detailing for clients out of my home for the past year. I only do about 3-4 cars a month but mainly focus on corrections and coatings. I completed the 3M training at Star Shield Solutions in June and have been slowly tackling projects since then.
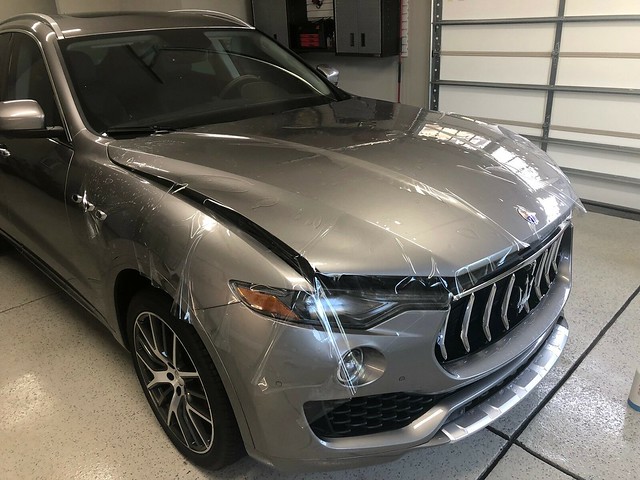
Since the class, it was time to swap to my wife's vehicle and she became fixated on the Levante after seeing one at the local mall. After trying to sway her in another direction for a few weeks, I gave in and started the hunt. I ended up finding this one as a '17 hold-over down in Charleston thankfully we were already heading that way for a little vacation. I was super eager to put my new 'skills' to the test and ordered the film shortly after taking delivery. I went w/ 3M pro, pre-cut bumper, headlights, mirror, and deck lid. Bulk 60"x66" for the hood.
Despite having 200miles on the odo, the paint was dull, contaminated, and swirled after sitting on the dealer lot for a year. I spent the next three weekends doing a two step correction then protecting with Wolfgang's Deep Gloss Sealant and SwissVax Mystery. Now that the paint was proper, it was film time. I debated about only using a spray sealant on the surfaces that were to be wrapped but wanted to see how the film would play w/ a slick surface.
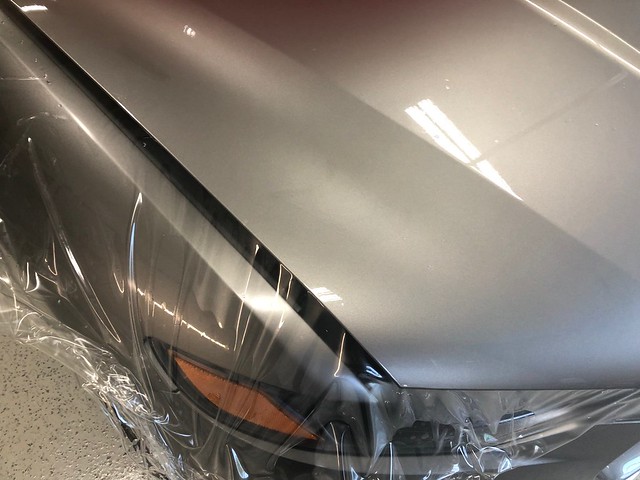
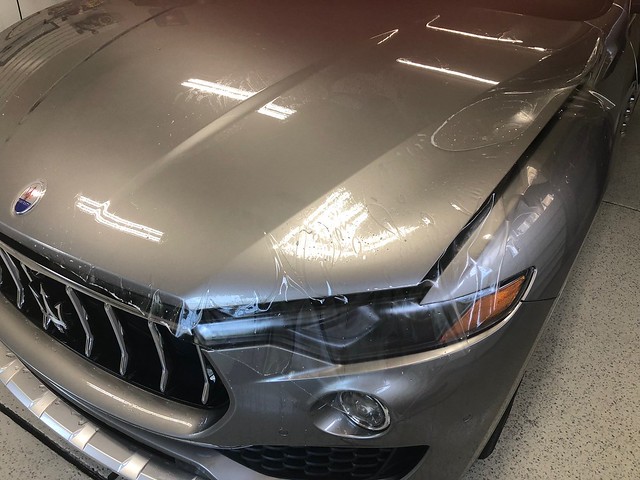
I split the film work over two weekends, with the first being to tackle the hood. My only film experience was the 3 day training. I think I spent 30minutes just staring at the film and car before getting the nerves to get cracking. Removing the backing paper proved my biggest (first) challenge. I basically drenched the thing the best I could and peeled away. Once removed, I played tug-of-war getting the film in a decent location before tacking the ends by the a-pillars. Then tacked at the headlights and started in the middle to work outwards. I struggled with the forward lip by the grill the most but the end result is decent. My wrapped forward edges left a little to be desired but it's on there and my first full solo hood was complete.
mid process shots
 mashood_1 by Larry Bishop, on Flickr
 mashood_2 by Larry Bishop, on Flickr
 mashood_3 by Larry Bishop, on Flickr
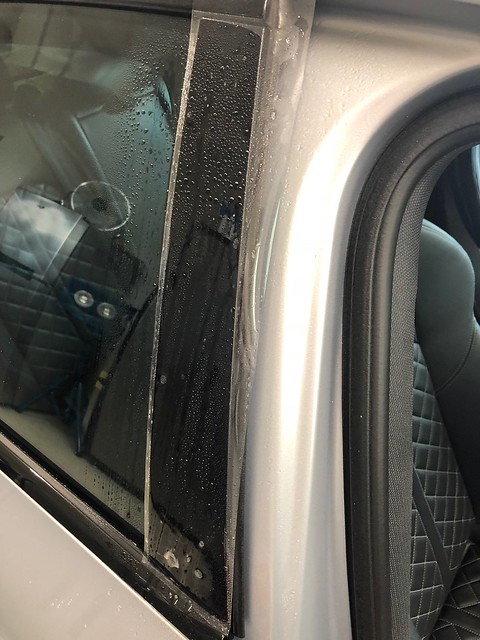
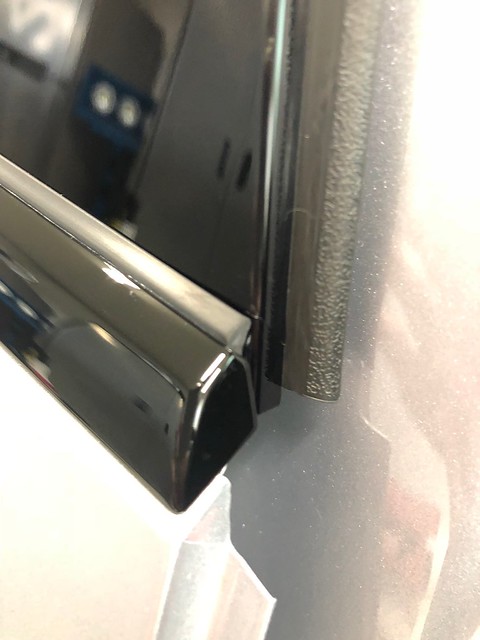
My next little job was the b-pillars on my s4. I'm starting to play with a roll of dynoshield that Micheal at STEK sent a little while back. After correcting and prepping the billars, the film went down. I used #10 scalpel to cut the edges and pretty happy with the end product. I like doing these smaller pieces as the risk is low and I feel that every chance I get to use the film is a learning opportunity.
 bpillar_1 by Larry Bishop, on Flickr
 bpillar_2 by Larry Bishop, on Flickr
 bpillar_3 by Larry Bishop, on Flickr
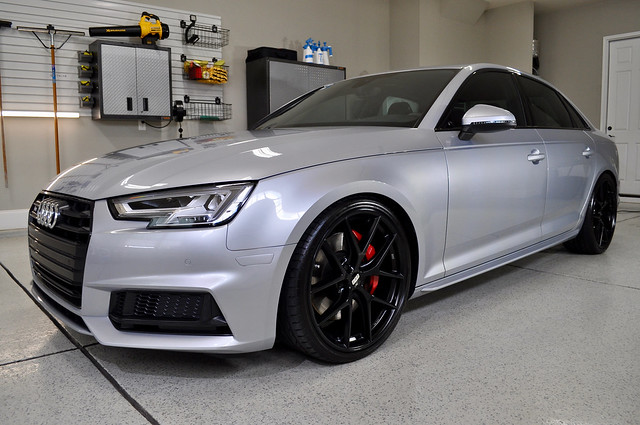
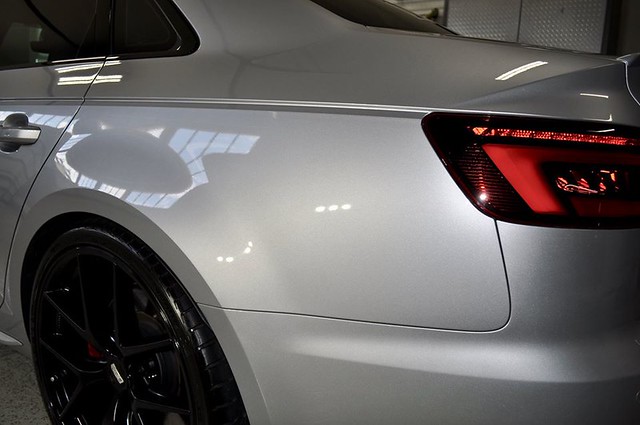
I had suntek ultra done on the full hood, bumper, mirrors, and headlights by a local shop last year. Maybe I'll remove it at some point for my install but it's working just fine. I did change up the protection recently though. I corrected the paint to remove the minor swirls and the old coating to make room to try Feynlabs Heal Lite coating. This is a self healing coating that I'm eager to try out. Given it's not safe for ppf, I used Feynlab Ceramic Lite and TopCoat for the rest of the painted surfaces. It's super slick and working well thus far.
Thanks for reading,
Larry
 IMG_0167 by Larry Bishop, on Flickr
 s4_4 by Larry Bishop, on Flickr
-
Nice! I saw some posts about this an thinking about trying it on my car. I've been playing w/ the dynoshield that Michael sent a little while back.

New to PPF - my latest install
in Paint Protection Film, Clear Bra Forum
Posted
Thank you very much, Todd. So much to learn!