

Ridler
-
Posts
244 -
Joined
-
Last visited
Content Type
Profiles
Forums
Events
Subscriptions
Posts posted by Ridler
-
-
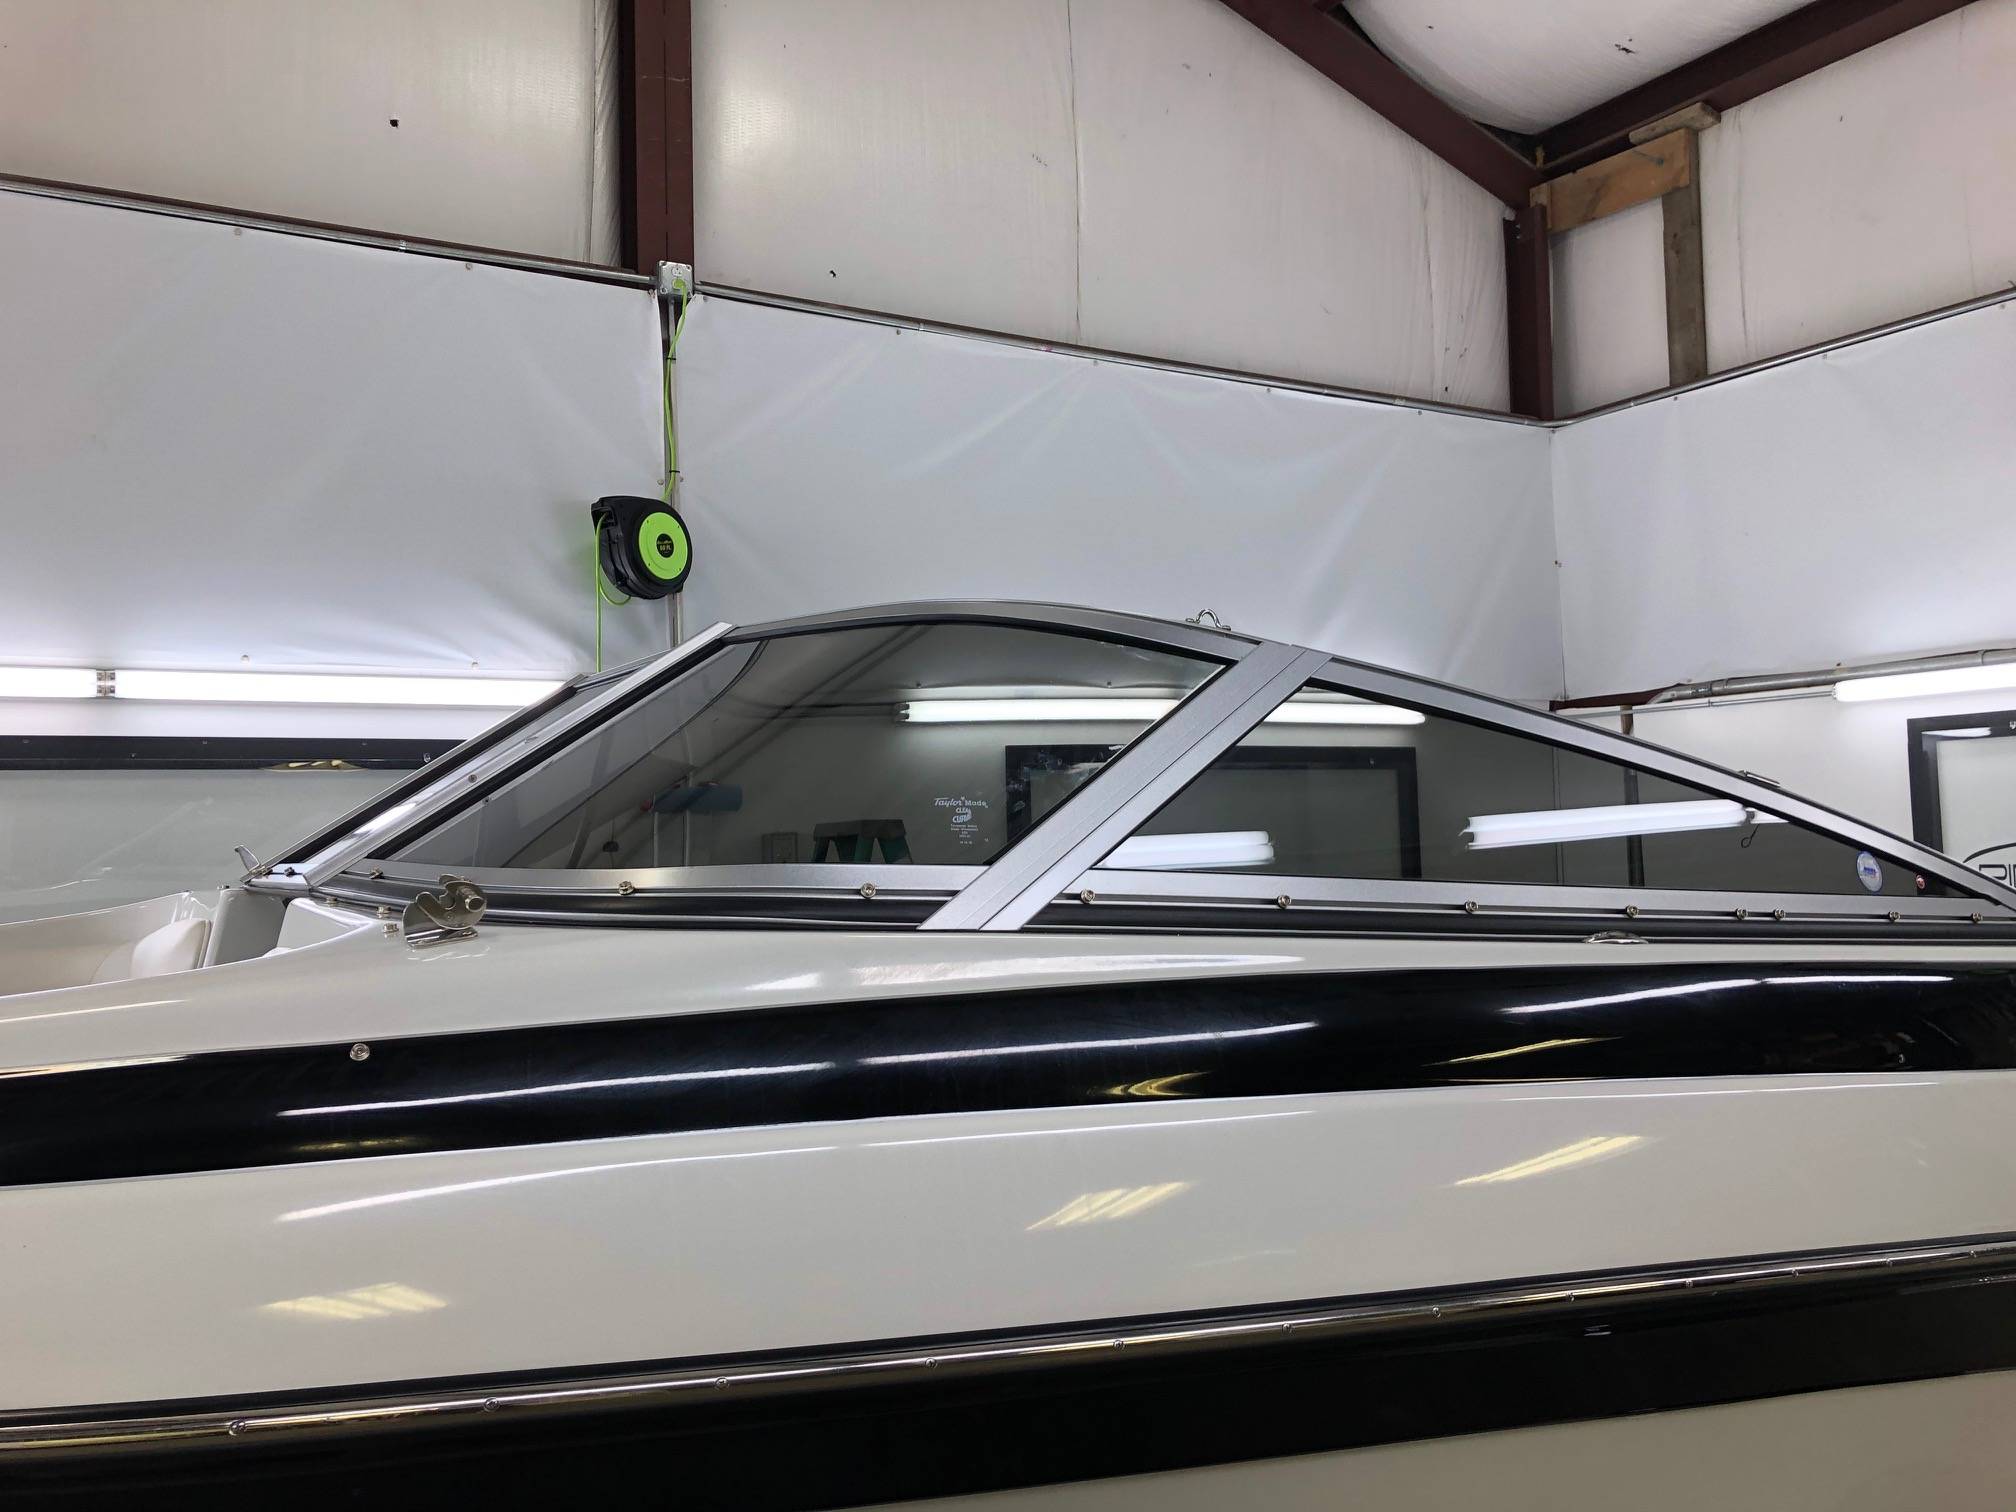
So to keep this short, we were asked by a boat dealer down the street to tint a Baja boat that has a wrap around windshield. The boat had a tree fall on it and they have repaired everything. The company doesn't make replace glass for the windshield so they had to get acrylic instead of glass. I'm hesitant to try and install on this due to the heat we'd have to put on it for the curve.
I'd like to know what others have done in this situation. Have you had any issues with acrylic, have you had any adhesion issues etc.
Please note, I've done boats of this style and curve and don't have a problem with them. My issue is that it's acrylic and not glass.
-
So just a quick update on this one.
We got it done. While we did try all the methods, the trick was to just keep heating the curve from the outside and slowly working the film down until it stuck. PITA!
Maybe no more boats for us for awhile.


-
Someone mentioned cleaning the glass with 409 to see if that would help the film stick.
-
Bham, thanks for the reply. I have the glass out of the boat so the trimming happens after we have the film laid down. So I don't think that's my issue.
I should also point out that it's not just the curve were it's not sticking, it's also the flat part of the window as well.
-
So I had a boat last week. A Crownline 18SS. We took it all apart to get a good clean install since the boat was in really good shape and it had never been apart. We tinted the side triangles with no issues since they were flat and the pass through as it was the same. The two curved windows are were the problem came in. We got the passenger side done with just a minor issue which we solved pretty quick but the drivers side window has been completely different. The film won't stick to the glass. I know this sounds crazy but here's what we've tried. It's been hot and humid so we've had a lot of slip in our solutions lately but we tried with a little less, no change. We tried with no slip and it still wouldn't stick. I even tried a alcohol water solution and that didn't even make the film stick. I even went as far as just straight up film with no slip to the glass and it still wouldn't stick. I was so bad that I put a piece on there, let it sit for over 20 minutes till the customer showed up and showed him that it could be moved and taken off with no residue. We use Global QDP on everything and I've never had this happen.
I've never seen this before, ever!
So I'm asking my fellow tinters. What's your thoughts on this?
I did clean the glass with straight alcohol, heated it from both sides, steel wooled it and tried a torch to see if there was something on the glass. Nothing worked. It's safety glass for those that wanted to know and I'm able to shrink the film to fit. It's the only window that isn't done on the boat as the other curved window did not have this issue.
Let me know your thoughts, comments, solutions etc.
Pic below of passenger side. Drivers side is the same.
Thanks!
-
So follow up on this one. This one is cake. Frameless windows on a bigger suv makes this one easy. FVD pattern is good and no tweaking needed.
-
Anyone done one of these and can share some insight? Mainly just on the fronts.
-
The front door quarter windows are super tight and I've noticed the rubber gaskets are not consistent side to side. They are difficult to get the film in place. Patterns in FVD on the main roll ups is good but the quarter glass needs some work.
-
You can use it full strength if you don't want to do any scraping and watch the glue just melt into a sloppy mess. But I use it 3 to 1 for most applications. Just let it sit and do it's magic and you should be good to go after about 3-5 minutes.
-
So I would agree that pulling the rear deck makes it worth the extra time to get a good clean install. I found it hard to try and get anyone of the tools behind the rear brake light. Worth the 10 minutes to pull it.
-
With the exception of folding down the rear seats for the headrests do you also need to remove the rear deck tray as well? I used to on the previous model just to make it super easy but not sure if you need to on the new one. Haven’t seen one yet and have a new one on the schedule.
-
Thanks for the reply on this. I did one and can see why it needs to come off, however, I did do it without taking it off. I would however recommend taking off the interior panels around the back window. Makes it much easier for install.
-
Curious on this one why the spoiler has to come off. Can you expand on it please?
-
Did you ever get this figured out? I only ask cause I do these type of bonds at my other job and since I'm not on here much I just saw your post. Message me if you still need help with these.
-
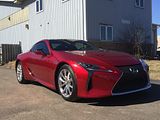
So here's the report on this new $100K performance luxury car. Back seat and window is tight to get into. Watch the bottom corners of the back window. The C pillars are tight at the bottom. Side and quarter windows needed shrinking. While the main doors looked like both top and bottom needed shrinking, I just did the bottom and didn't have any issues. The back of the side glass has a 3/4" blacked out area so you can be a little forgiving on your cut along back edge. I used FVD patterns and they were pretty good. Front doors also drop down when you open the door so I just remove the screw holding the sensor in the jamb completely and they stay up no problem. Here is the final product.
-
I didn't see anything on this model. Anyone done one yet? I can't imagine this one is that hard but I haven't seen the car in person and the back window looks pretty sloped. Any insight is appreciated!
-
I'm a one man show at my shop. I went the route of a plotter and software when I got back into the business after being gone for over 10 years. I will say that the plotter is much faster then hand cutting for me. I've taking my time down about 20-30 minutes a car in total. I can typically do most cars in about an hour and a half to 2 hours for bigger or more difficult cars while still turning out great work. The longer times are not always based on cutting the tint either. It could be because of 3rd brake light removal or other factors about the car that just take more time. I've timed myself on cutting out a cars patterns and can typically get a full car cut in about 5 minutes and that includes putting the film on the car for shrinking. I'm always moving so while patterns are cutting I'm wiping down the windows and soaping up the back window and back and forth. The other nice part about a plotter is that if I do mess up a piece I can cut a new one in seconds! I guarantee you that you can't hand cut a piece that fast. I believe a fellow tinter once posted a video were he timed himself cutting a Toyota Camry on his plotter start to finish and challenged someone to hand cut the same car and beat his time. I don't think anyone's posted a video beating his time. Although I could be wrong on that. So for me a plotter has definitely been worth the cost.
-
So I do work for a Dodge dealership and have done many Chargers over the last couple of years. Until recently I've had no issues with peanuts. However, the last three that I've done have had a ton of peanuts in the BG!!!! I use 000 steel wool and then scrub with a white scotchbrite. I do an H pattern with dryer sheets and make my middle mark a little higher in the glass. I heat slow and move around and have never had a problem with shrinking it. I've done it this way for many of these cars with no issues but lately this car has become my nemesis!!!!!
I've cut back on soap, but with to little soap and with this big BG it makes it difficult to get it in position. I'm just a little lost on what to do. I'm thinking of trying what the PPF guys do and try and put in some alcohol into my slip solution or try and use a separate solution of just alcohol and water after I get the film onto the glass.
I just did another one tonight and I even had a peanut smack dab in the middle bottom of the glass!
Any other suggestions you guys have that maybe I should try?
-
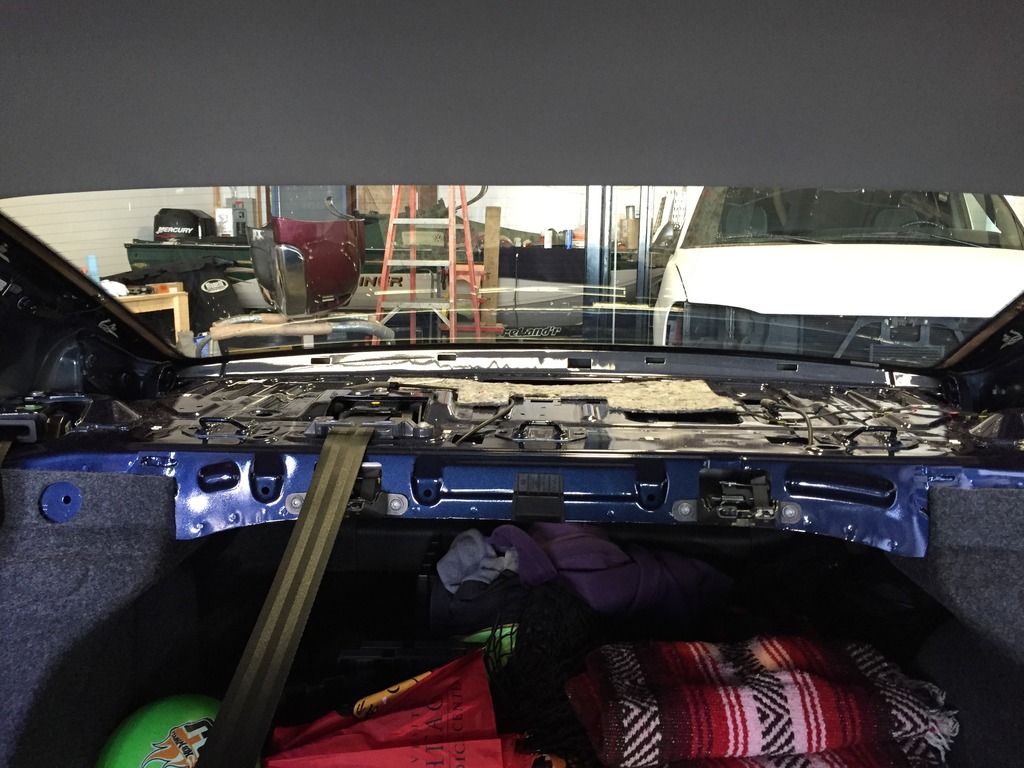
Here is some pics of the rear deck and the lid turned upside down so you can see where the clips are. Just not that the clips tend to stay in the decklid and need to be pried out and then put back in the deck lid. Also note the C pillars need to be taken out as well in order to get the deck lid out.

-
What's the issue with the rear deck? Is it tight along the bottom of the glass?
-
Haven't seen anything on this car yet. Can anyone shed some light on this model? I've never done one but will be soon and just wanted to see what to watch out for. Thanks!


2021 BMW M8 Grand Coupe
in BMW
Posted · Edited by Ridler
This car is cake. Frameless and super easy back window just like every other BMW. Rear brake light pulls out like every other one. There is a fuse panel on right side of trunk but easy to get to so you can cover it up. All in all not a bad car to tint.